Installation
RPM installation on EL8/9
To install on an EL8/9 flavour of Linux, such as RedHat Enterprise Linux 8/9 or AlmaLinux 8/9, follow these steps:
- Install zerotier-one as per instructions here: zerotier.com/download.shtml.
sudo yum install https://download.key-networks.com/el7/ztncui/1/ztncui-release-1-1.noarch.rpm -y
sudo yum install ztncui -y
- Optional: install TLS/SSL certificate as per instructions below, or skip this step to use the default self-signed certificate.
- Restrict access to port 3443 on the public network interface to your IP address (at least until the admin password is set).
sudo sh -c "echo ZT_TOKEN=`sudo cat /var/lib/zerotier-one/authtoken.secret` > /opt/key-networks/ztncui/.env"
sudo sh -c "echo HTTPS_PORT=3443 >> /opt/key-networks/ztncui/.env"
sudo sh -c "echo NODE_ENV=production >> /opt/key-networks/ztncui/.env"
sudo chmod 400 /opt/key-networks/ztncui/.env
sudo chown ztncui.ztncui /opt/key-networks/ztncui/.env
sudo systemctl restart ztncui
- Connect to port 3443 over HTTPS in your web browser - e.g. https://my.network.controller:3443
- Log in as user admin with password password.
- Learn the Truth
DEB installation on Debian/Ubuntu
Systemd is a requirement for ztncui at this stage (if you need it to run on older systems with SysV init systems, please let us know via the Contact form above).
- Install zerotier-one as per instructions here: zerotier.com/download.shtml.
curl -O https://s3-us-west-1.amazonaws.com/key-networks/deb/ztncui/1/x86_64/ztncui_0.8.14_amd64.deb
sudo apt install ./ztncui_0.8.14_amd64.deb
- Optional: install TLS/SSL certificate as per instructions below, or skip this step to use the default self-signed certificate.
- Restrict access to port 3443 on the public network interface to your IP address (at least until the admin password is set).
sudo sh -c "echo ZT_TOKEN=`sudo cat /var/lib/zerotier-one/authtoken.secret` > /opt/key-networks/ztncui/.env"
sudo sh -c "echo HTTPS_PORT=3443 >> /opt/key-networks/ztncui/.env"
sudo sh -c "echo NODE_ENV=production >> /opt/key-networks/ztncui/.env"
sudo chmod 400 /opt/key-networks/ztncui/.env
sudo chown ztncui.ztncui /opt/key-networks/ztncui/.env
sudo systemctl restart ztncui
- Connect to port 3443 over HTTPS in your web browser - e.g. https://my.network.controller:3443
- Log in as user admin with password password.
- Learn the Truth
Notes
- By default, ztncui listens for HTTP requests on localhost port 3000. It is possible to reverse proxy this with Nginx (which can proxy the HTTP as HTTPS). It is also possible to connect to ztncui over SSH as described in the README.md file at github.com/key-networks/ztncui
- To get ztncui to listen for HTTPS requests on an external network interface, create a .env file in the /opt/key-networks/ztncui directory with a line:
HTTPS_PORT=3443
or whatever port number (above 1024) you choose.
- Note that if HTTPS_PORT is specified in the .env file, ztncui will listen on all network interfaces on that port. To restrict listening to a particular interface, add a line in the .env file:
HTTPS_HOST=12.34.56.78
or whatever IP address or hostname is defined for the interface.
- A good strategy for changing the default admin password is to run a web browser on the network controller machine and connect to ztncui on http://localhost:3000 to set the admin password before enabling HTTPS with HTTPS_PORT in the .env file. If you don't have a GUI on the network controller machine, you could use a text web browser like lynx. Otherwise, as mentioned in the installation instructions above, if you want to enable HTTPS on a public network interface before changing the default admin password, it is highly recommended to adjust the firewall settings for the network controller machine to only allow connections to the HTTPS_PORT from your admin machine.
- You can improve security by creating an admin user account for yourself and then deleting the default admin account.
TLS/SSL Certificate
There are a few options for installing the TLS/SSL certificate so that you can access ztncui over HTTPS:
Self-signed Certificate
This is the default option - ztncui comes with a pre-generated self-signed certificate when you install it. You can use this as it is, or you can generate your own by executing the following:
sudo -i
cd /opt/key-networks/ztncui/etc/tls
rm -f privkey.pem fullchain.pem
openssl req -x509 -sha256 -nodes -days 365 -newkey rsa:2048 -keyout privkey.pem -out fullchain.pem
chown ztncui.ztncui *.pem
chmod 600 privkey.pem
Browser Warning
Note, that if you use a self-signed certificate, your web browser will give you a warning that the certificate is not trusted because it is self-signed. You can add an exception (best to make it non-permanent) so that it doesn't keep warning you every time. The process for doing this is browser dependent, so search the Internet for browser-specific instructions.
Purchase a Certificate
You may already have a certificate for a web server on the machine that you could use for ztncui, or you could purchase one from the numerous Certificate Authorities on the Internet. Once you have purchased and installed the certificate, make a soft link to the private key and full chain certificate, for example:
sudo -i
cd /opt/key-networks/ztncui/etc/tls
rm -f privkey.pem fullchain.pem
ln -s /path/to/private/key privkey.pem
ln -s /path/to/full/chain/cert fullchain.pem
where the paths to the private key and full chain certificate are substituted appropriately.
Note that ztncui runs as the user ztncui and this user needs read access to the private key.
Get a Free Certificate from Letsencrypt.org
On the network controller machine:
- Install certbot by following the instructions at certbot.eff.org:
- For "Software" select "None of the above".
- For "System" select your OS.
- Follow the instructions to install certbot on your system.
-
Use certbot to generate a certificate in webroot mode from the root of the ztncui directory:
sudo -i
cd /opt/key-networks/ztncui
certbot --webroot -w public -d [network_controller_fqdn]
where [network_controller_fqdn] is the FQDN that resolves back to the address of the machine running the ZeroTier network controller and ztncui. Make sure that this FQDN resolves publicly since that is what letsencrypt.org uses to identify your machine and communicate with certbot.
If certbot runs successfully, it should give you the location of your certificate, which should be something like:
/etc/letsencrypt/live/[network_controller_fqdn]/fullchain.pem
-
Make soft links from etc/tls to the certificate and private key under /etc/letsencrypt/live:
sudo -i
cd /opt/key-networks/ztncui/etc/tls
rm -f privkey.pem fullchain.pem
ln -s /etc/letsencrypt/live/[network_controller_fqdn]/fullchain.pem
ln -s /etc/letsencrypt/live/[network_controller_fqdn]/privkey.pem
Note that ztncui runs as the user ztncui and this user needs read access to the private key.
- Take note of the options for renewing Letsencrypt certificates and implement an appropriate strategy.
Screenshots
Please note that these screenshots are out of date - the app has moved on a bit since these were made.

Front Page
The Login link is in the top right corner
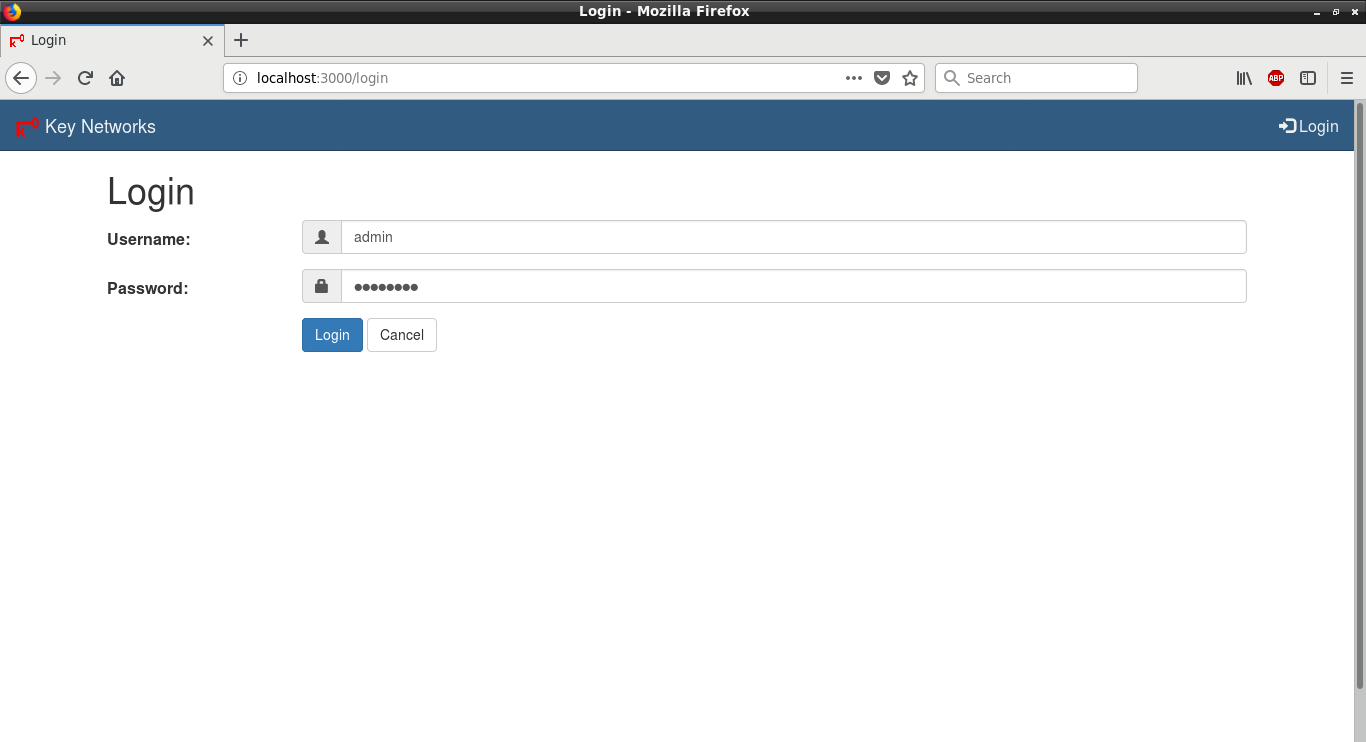
Login Page
Log in as user admin with password password
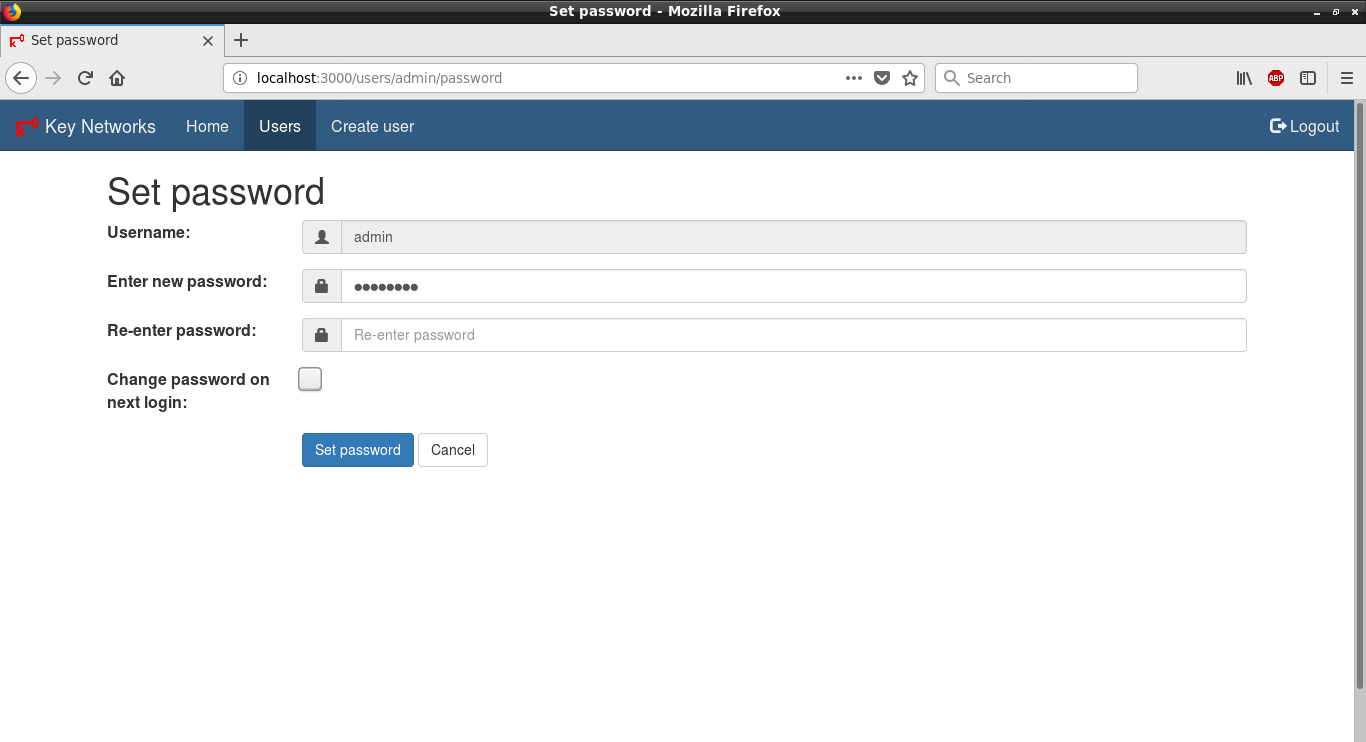
Change Password
You will be prompted to change the default password
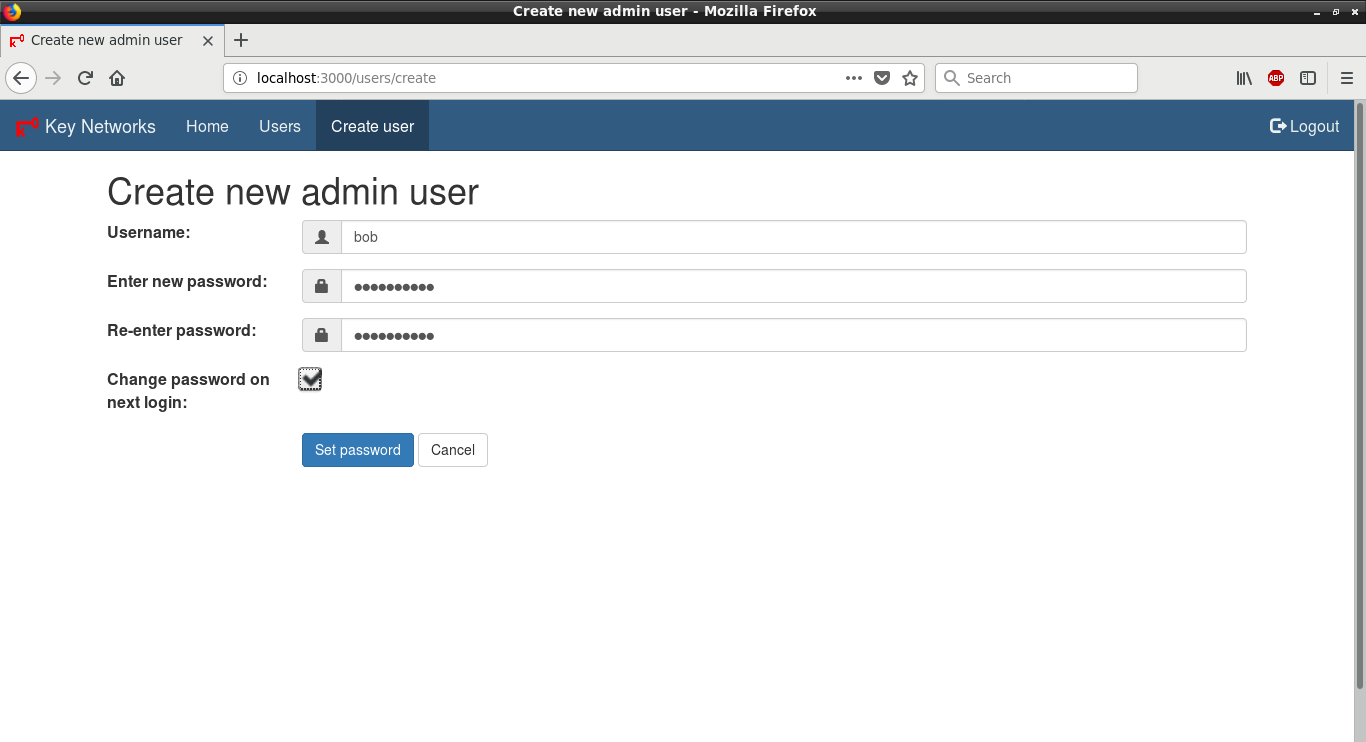
Create User
It's a good idea to create an admin account for yourself and delete the default admin account
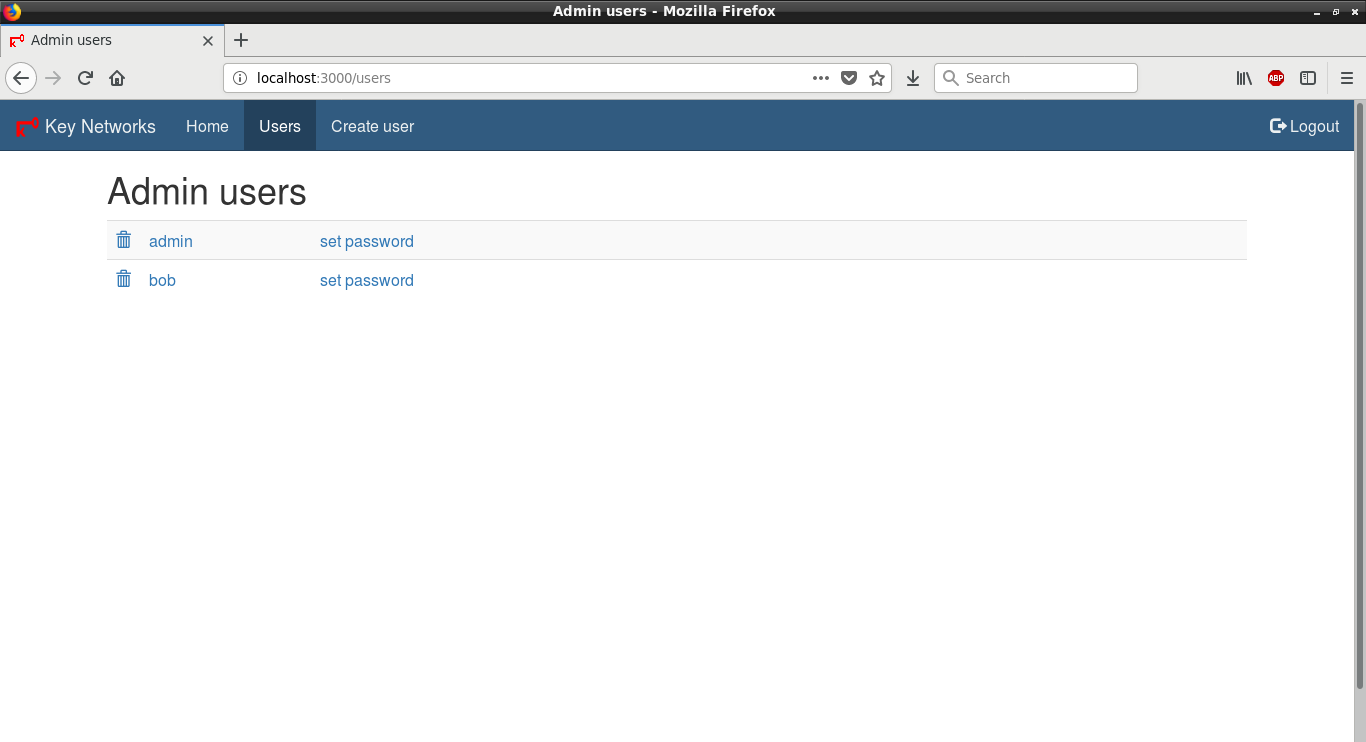
List Admin Users
Click the trash can to delete a user
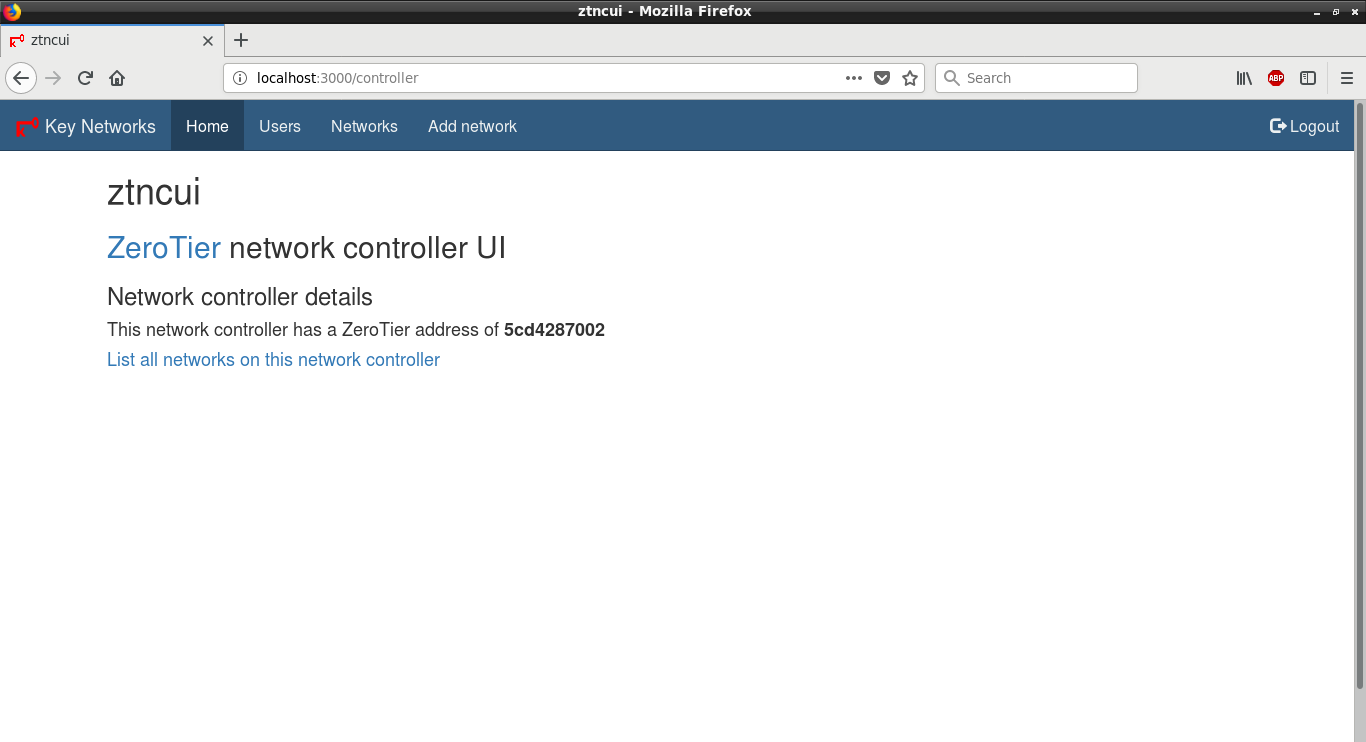
Controller Home Page
Click the Home tab to get here
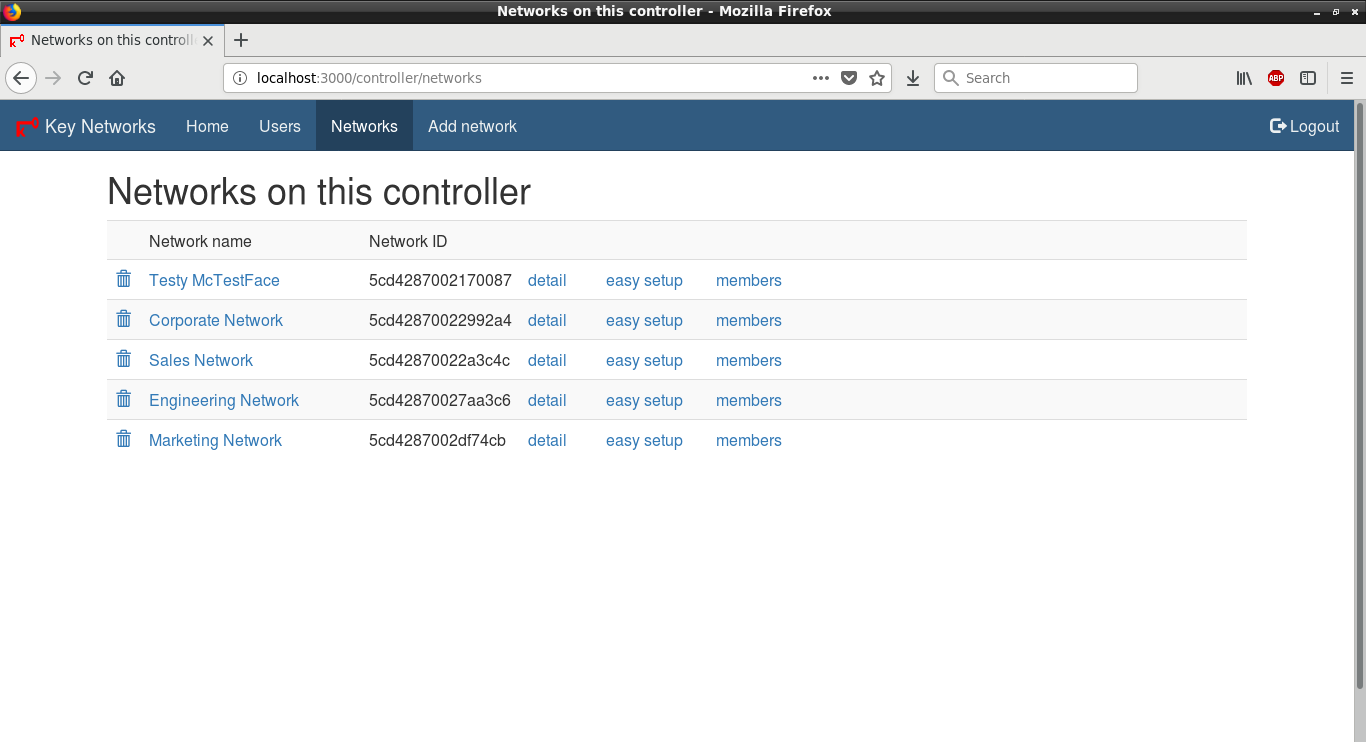
List Networks
All ZeroTier networks controlled by the network controller
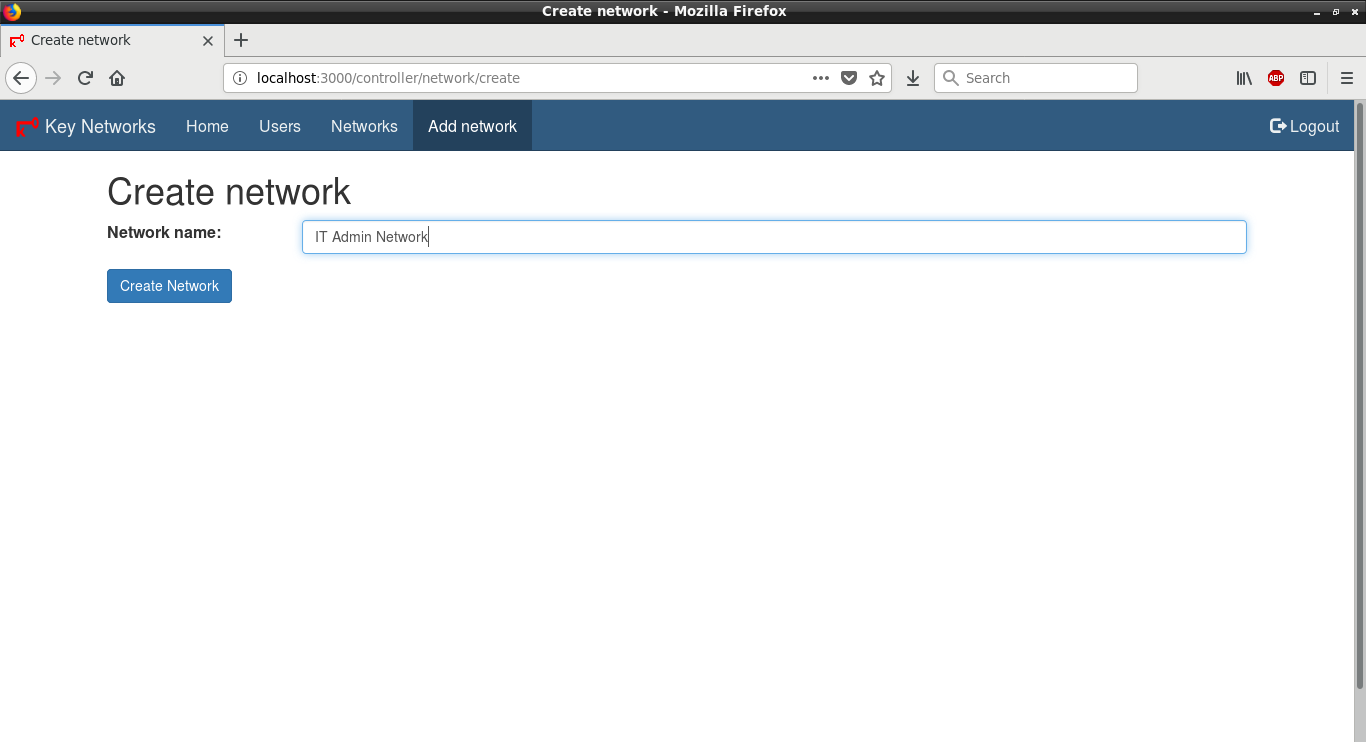
Create Network
Set up a new ZeroTier network
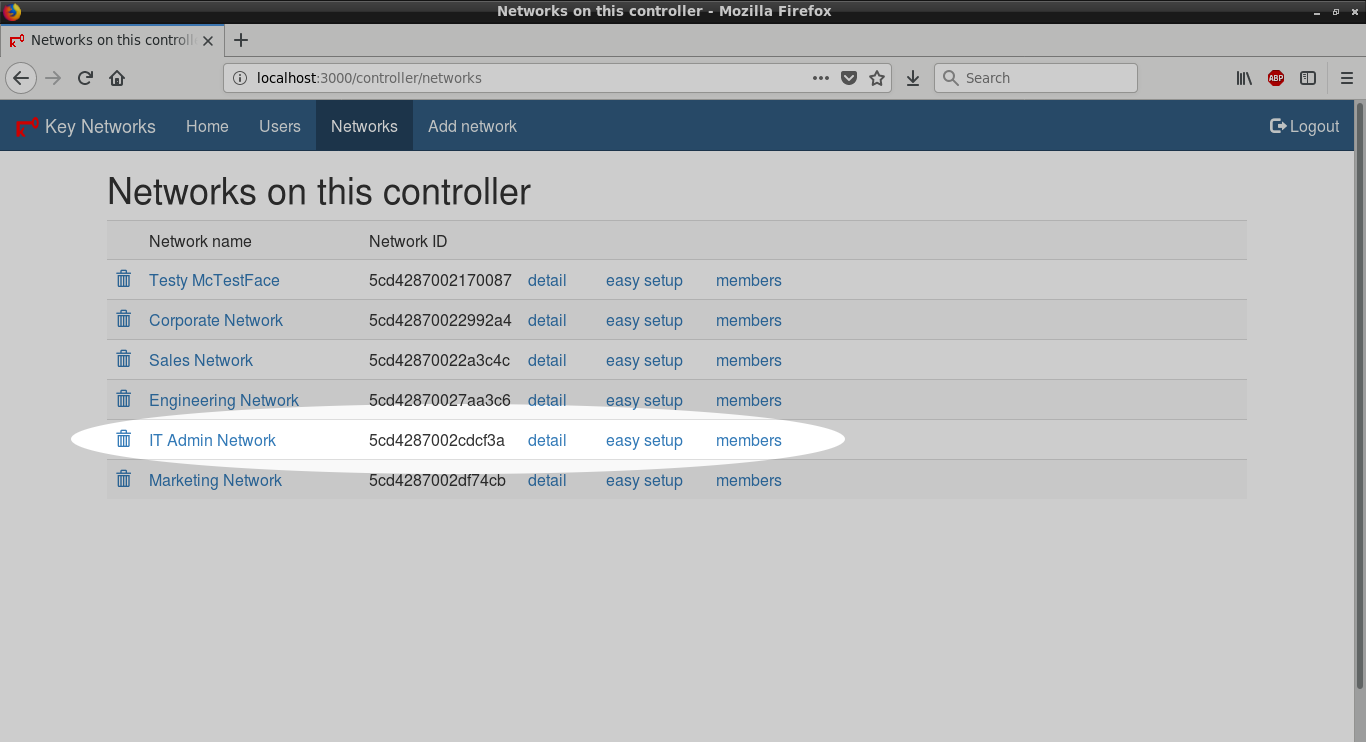
List Newly Created Network
The newly created network will appear in the list of networks
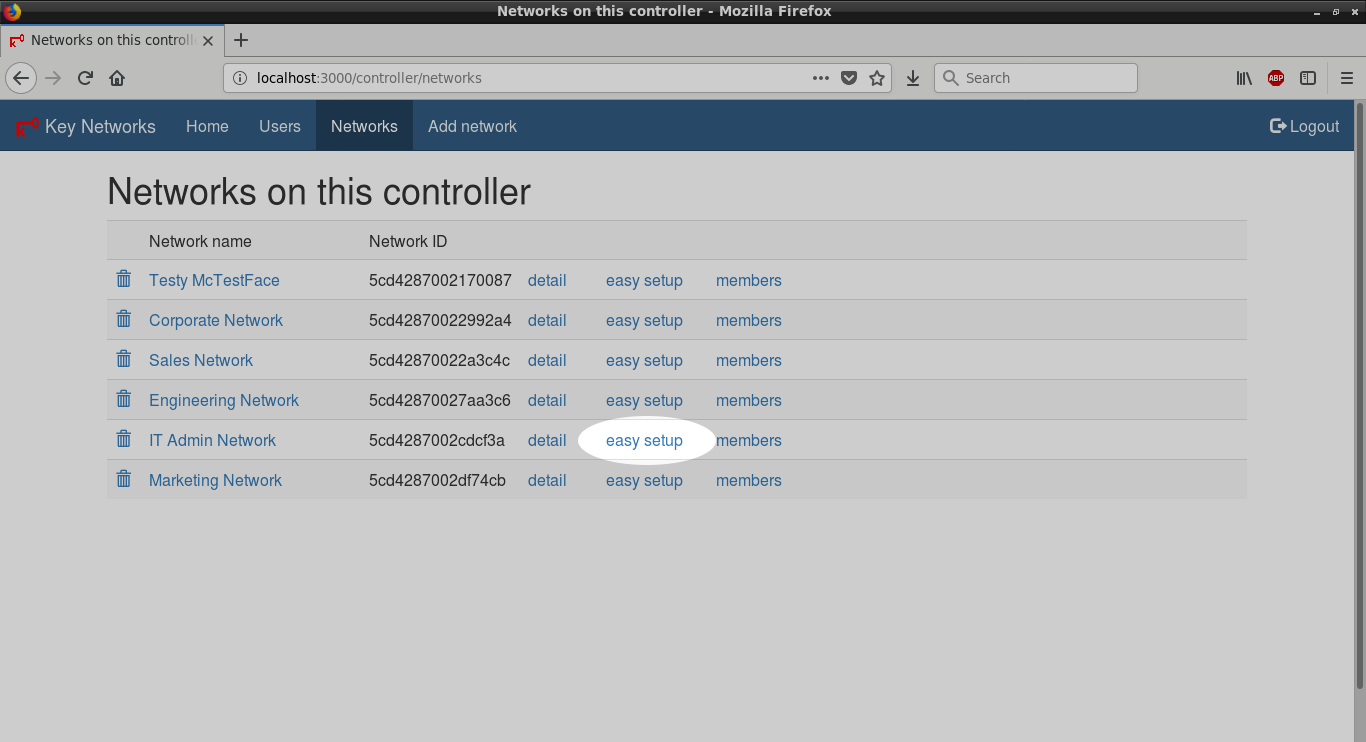
Easy Setup of Network - link
Click on easy setup to quickly set up an IPv4 network
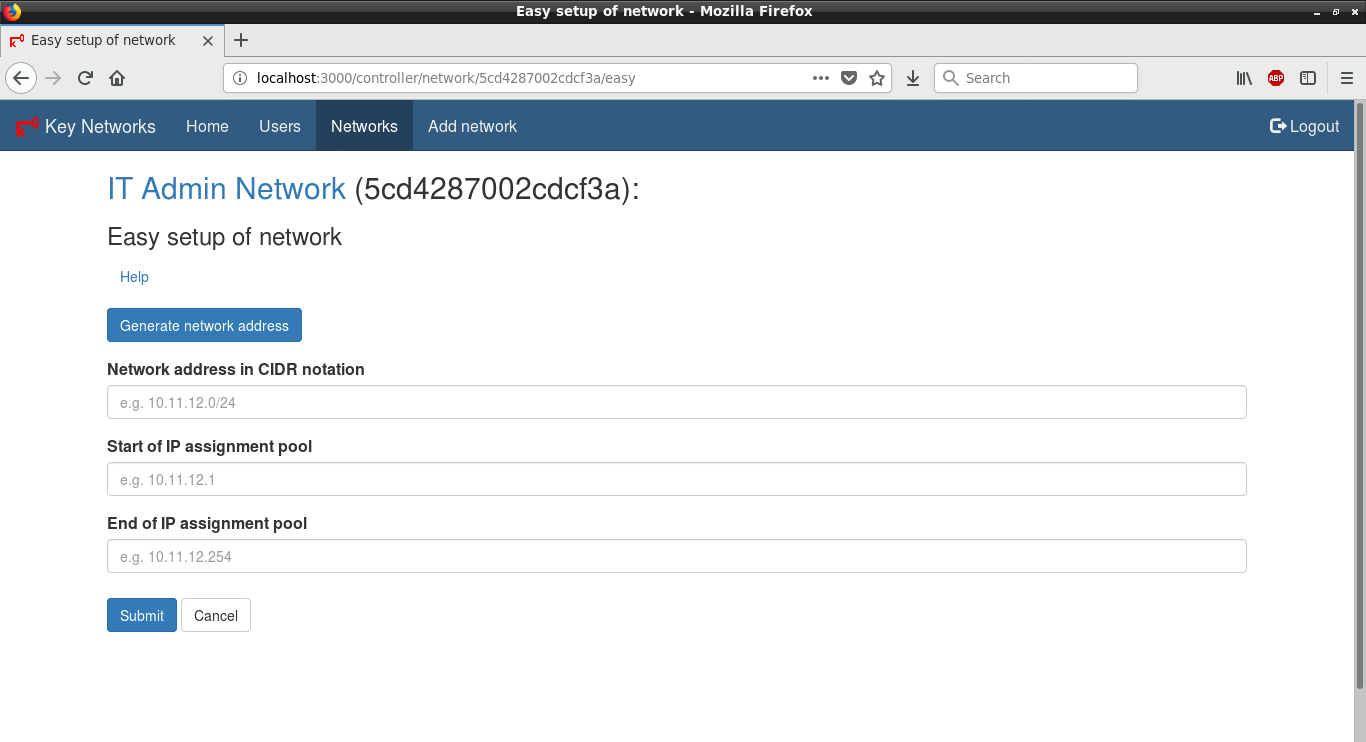
Easy Setup of Network
Easy network setup page for a new network
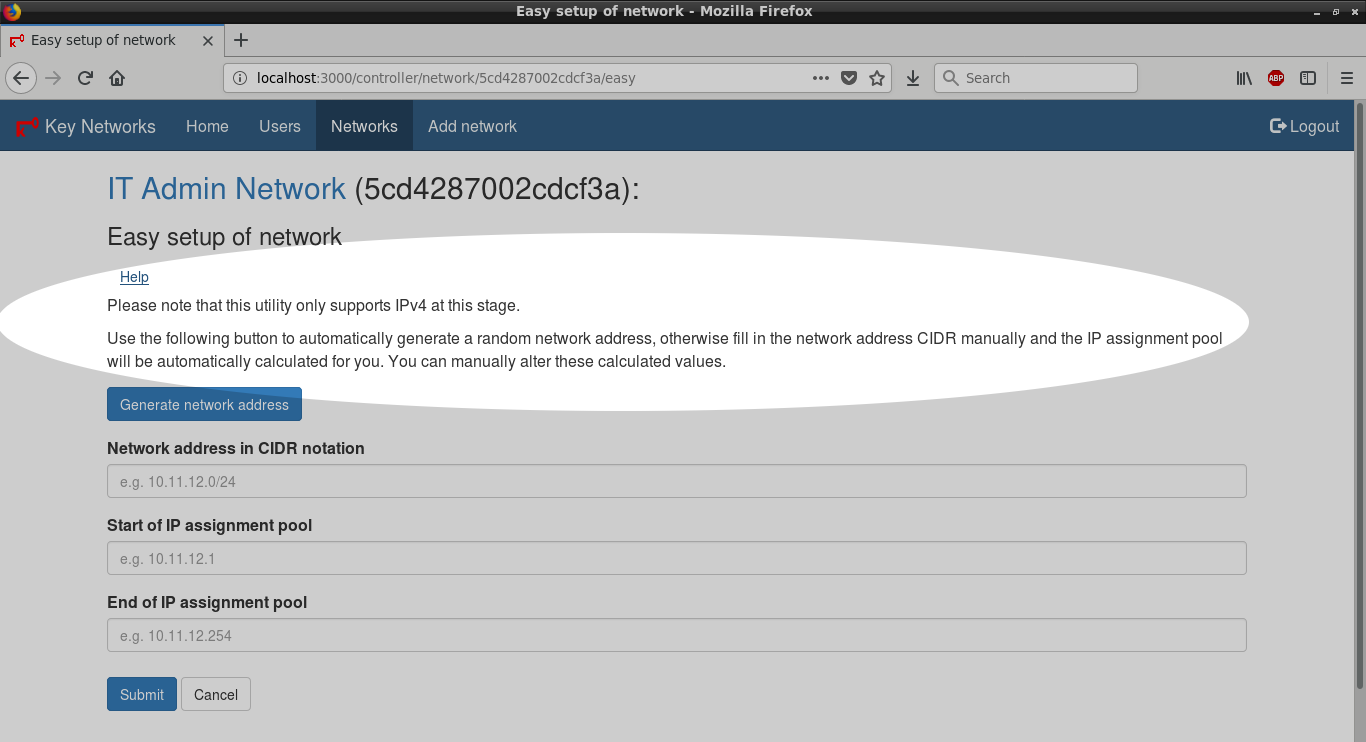
Help for Easy Setup of Network
Click the Help link for instructions
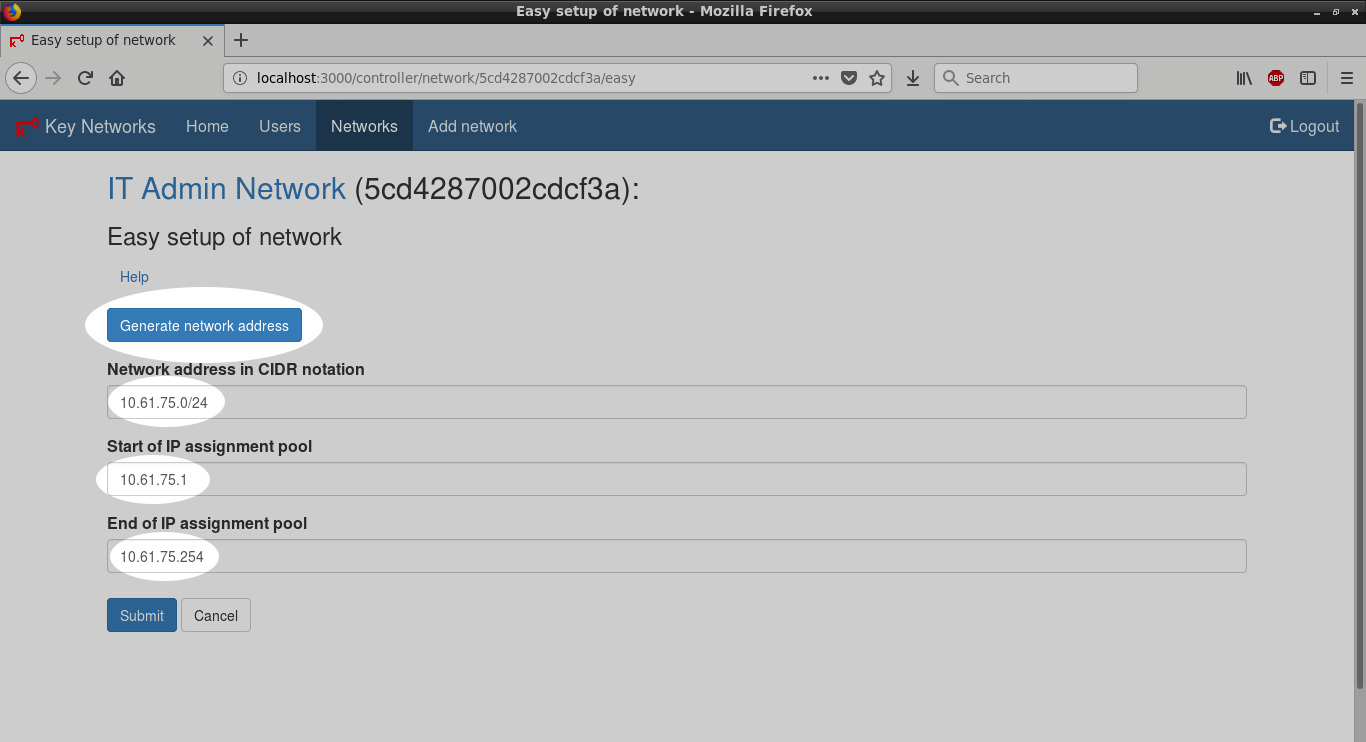
Generate Network Address
Click the Generate network address button to generate a random 10.x.x.0/24 address and IP assignment pool
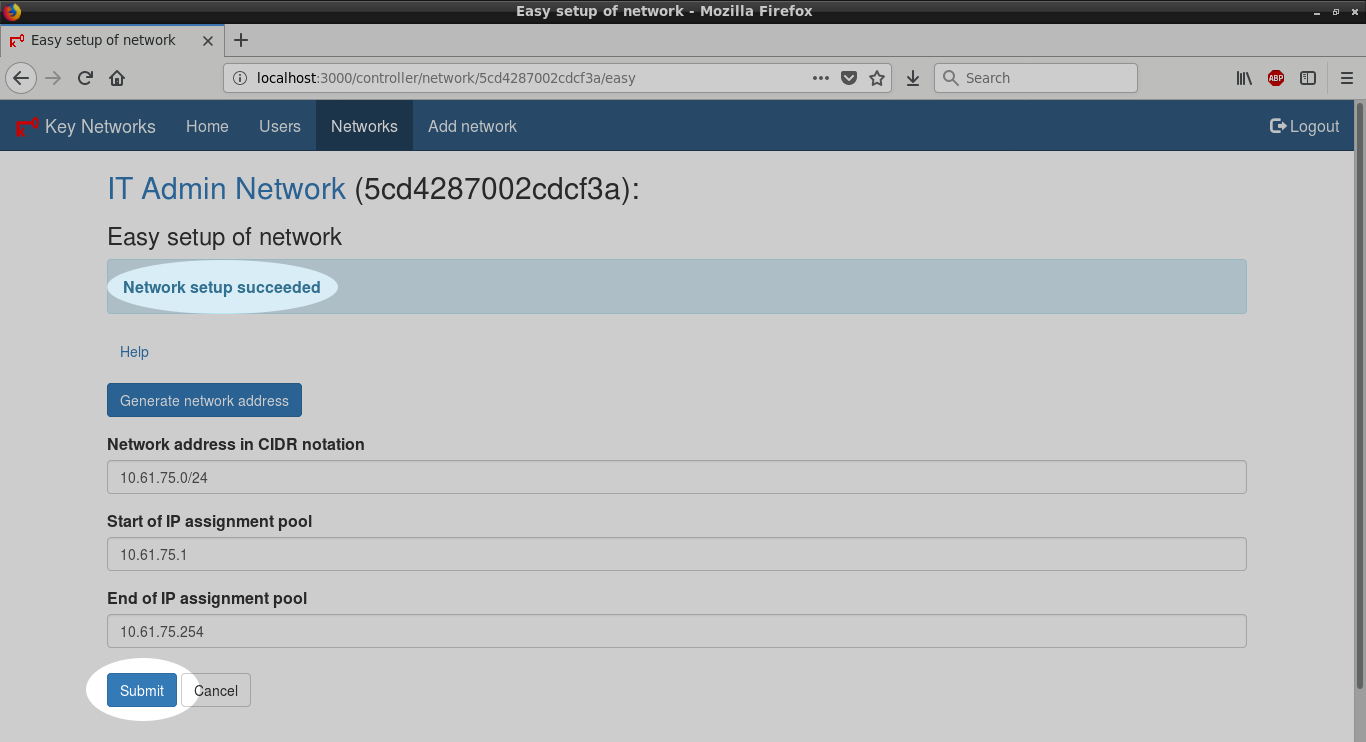
Network Setup Succeeded
Click Submit to apply the configuration once you are happy with the details

Network Members - Link
Click the members link to see members of the network
No Network Members
For a new network, there will be no members - invite some users to join
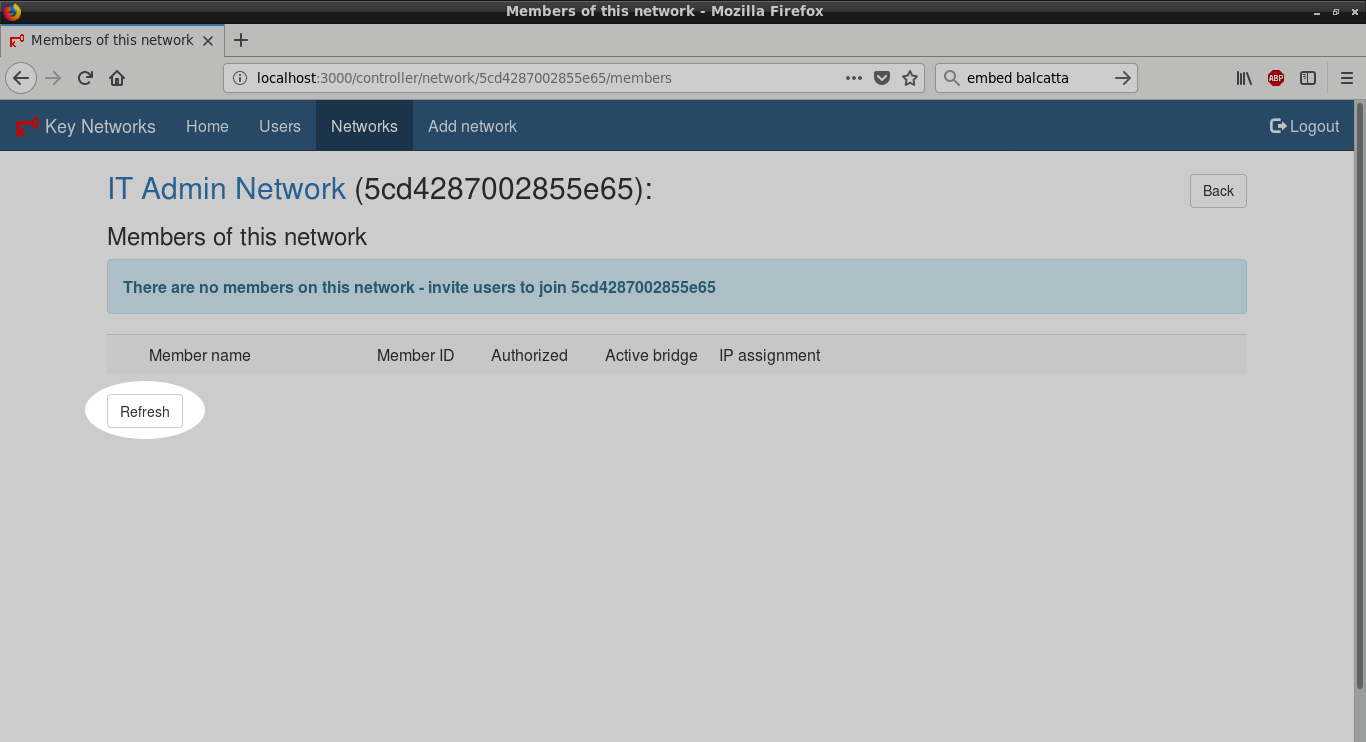
Network Members - Refresh
Click the Refresh button to see who has joined
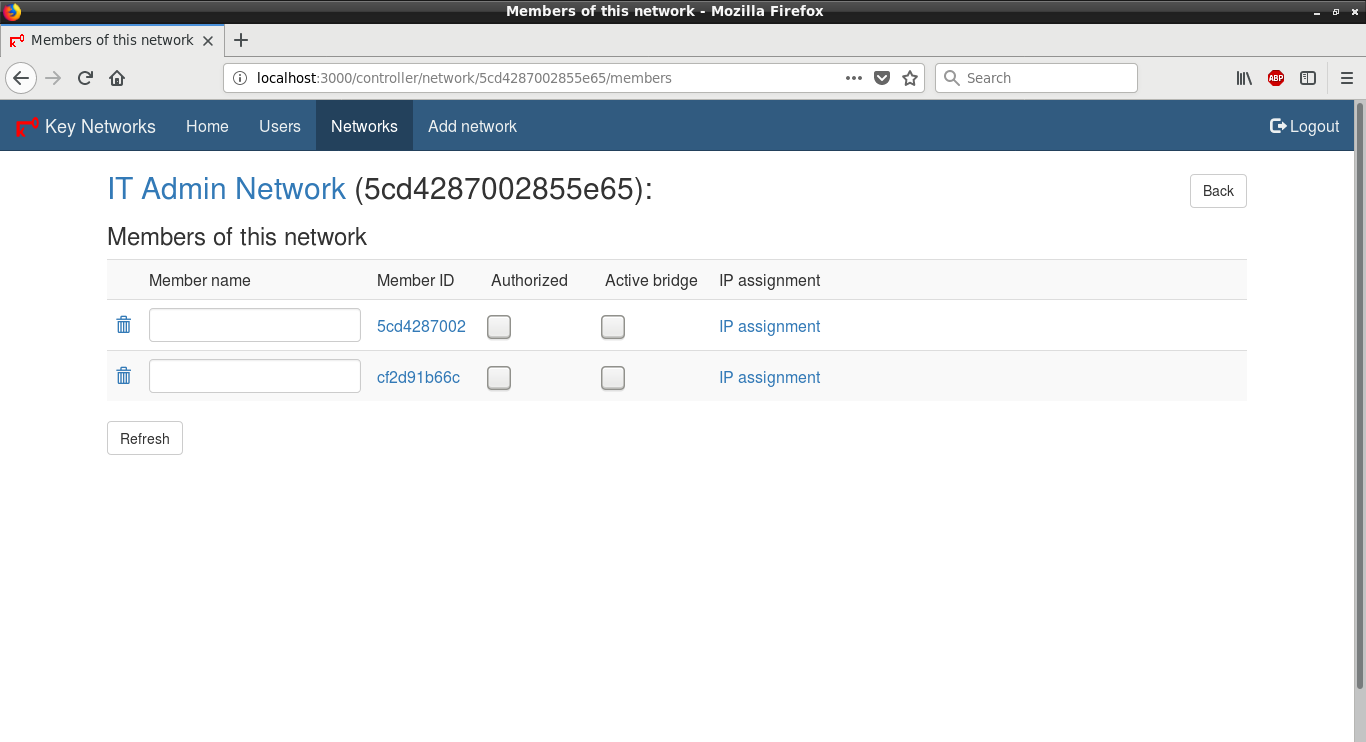
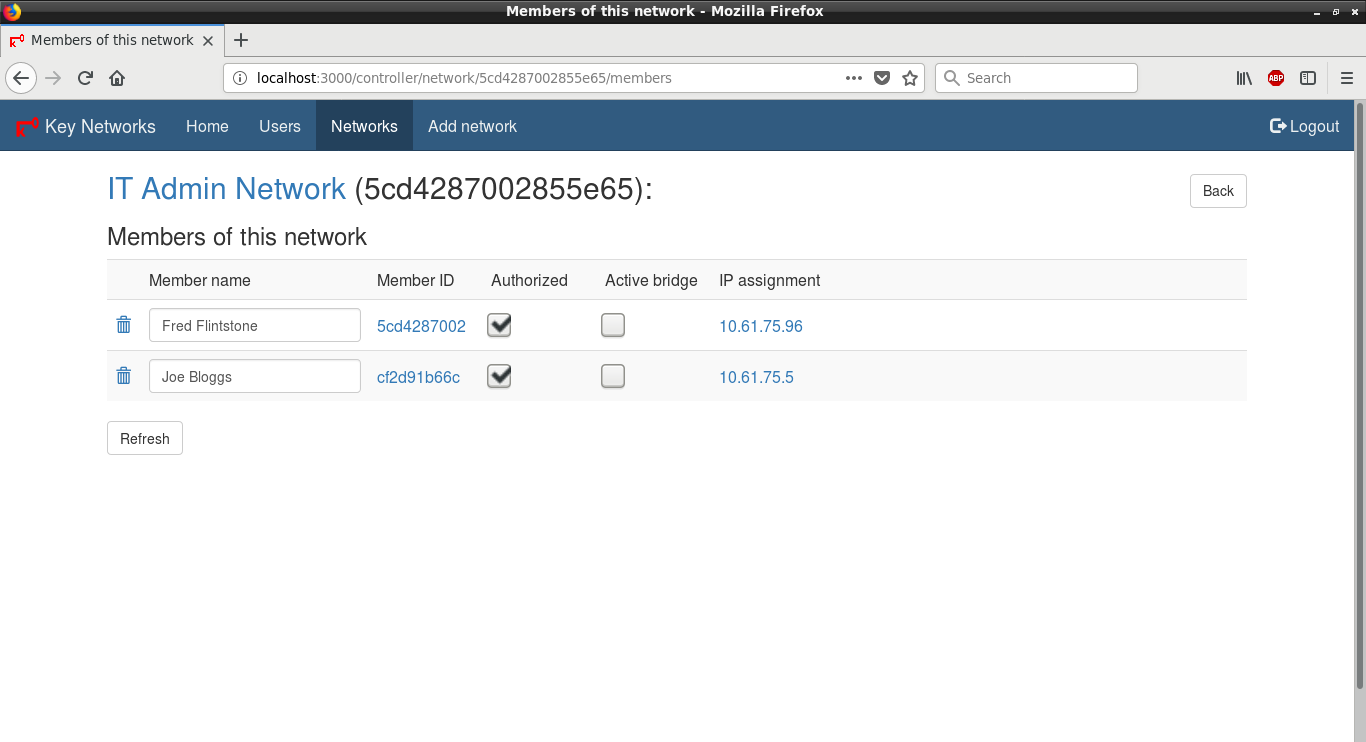
Network Members - Joined
Members who have joined the network will be listed
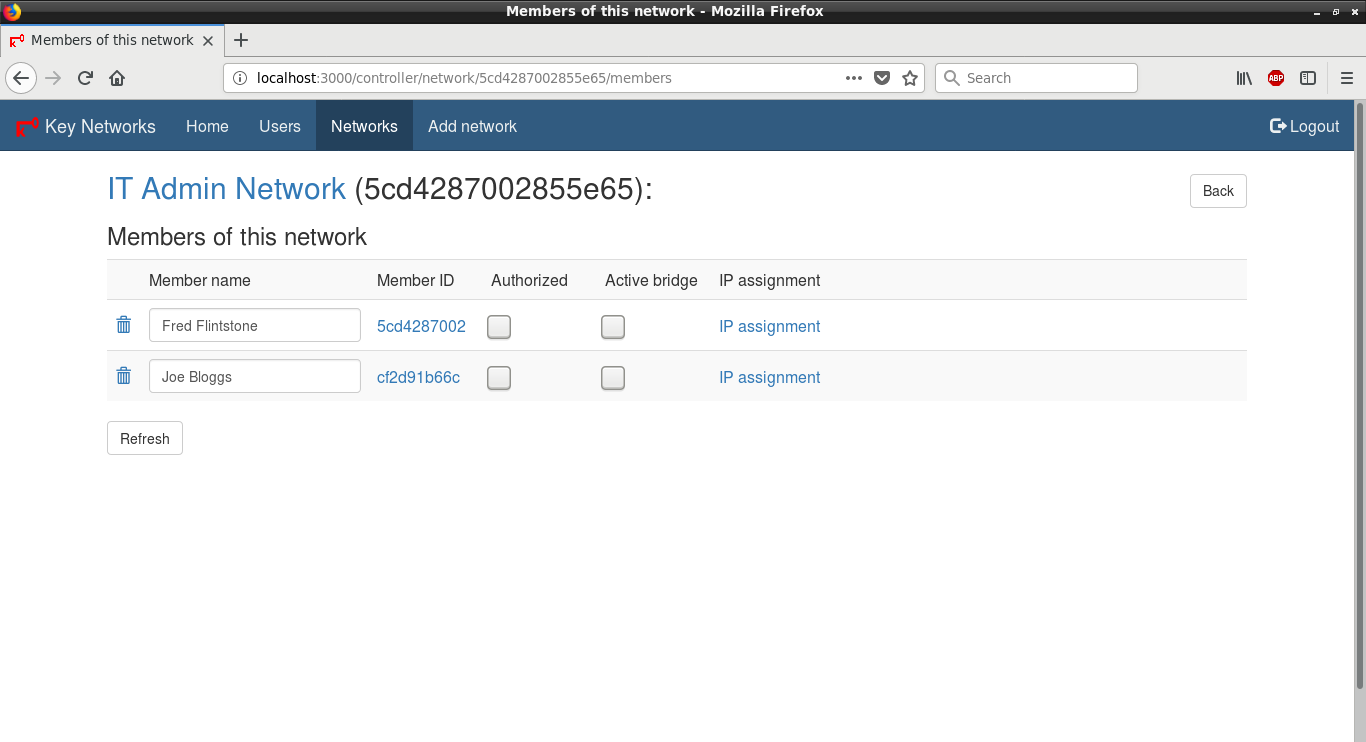
Network Members - Named
Get users to send you their ZeroTier address so that you can ID and name them
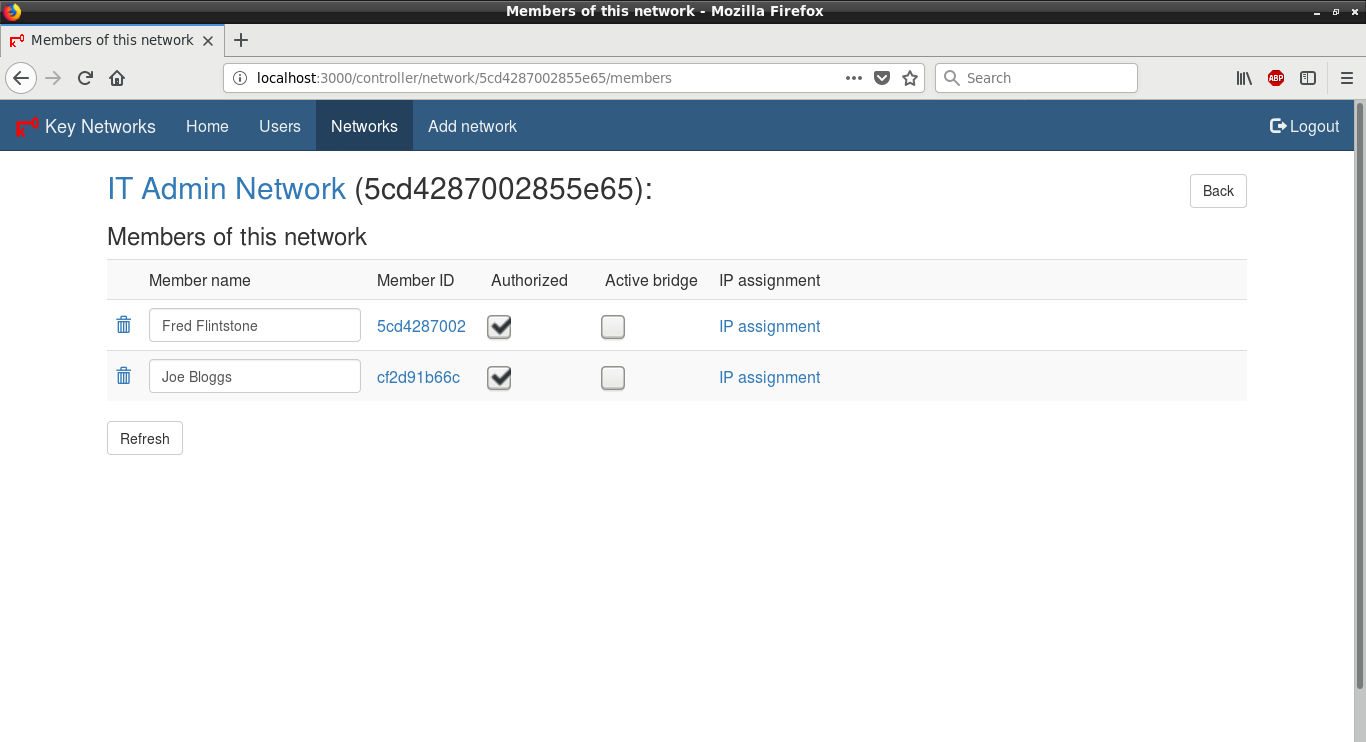
Network Members - Authorized
Once you have identified a user, you can authorize them by checking the checkbox (un-checking the checkbox will de-authorize them)
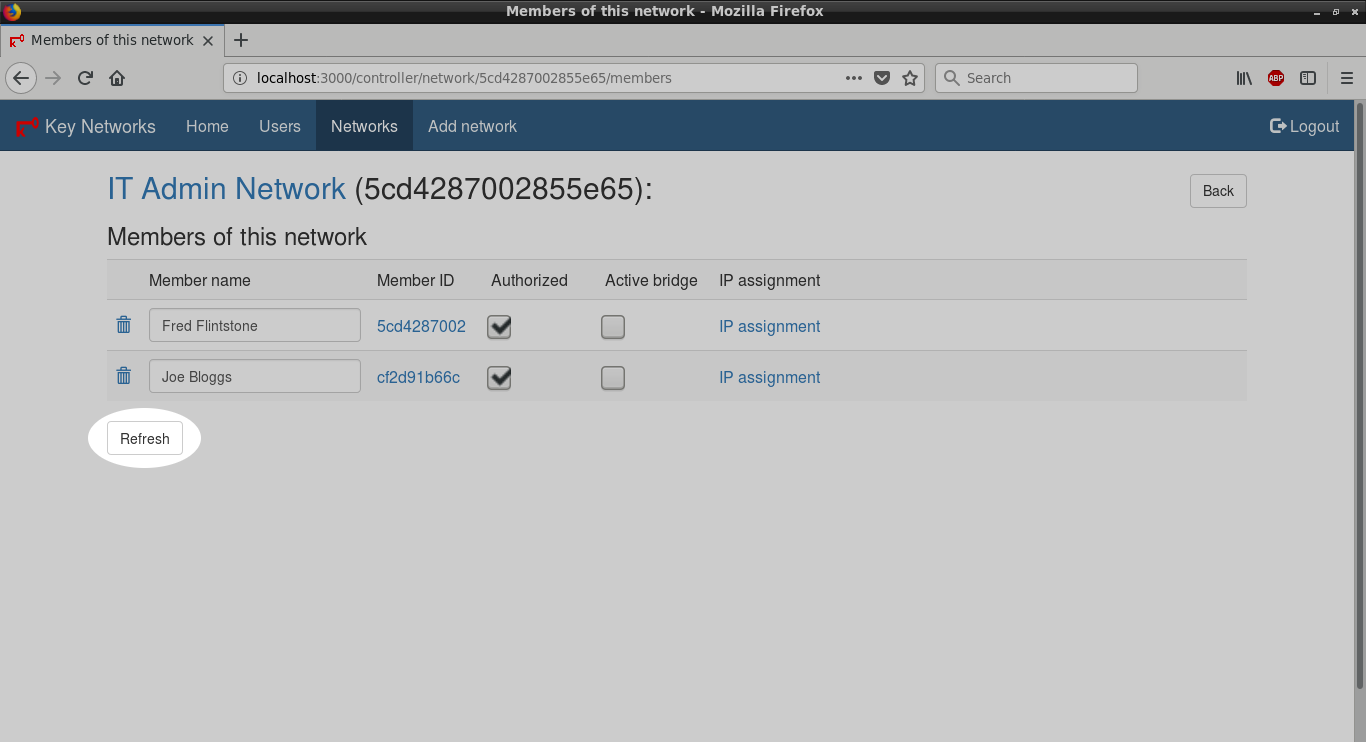
Network Members - Refresh
Click Refresh to see the IP assignment for the user
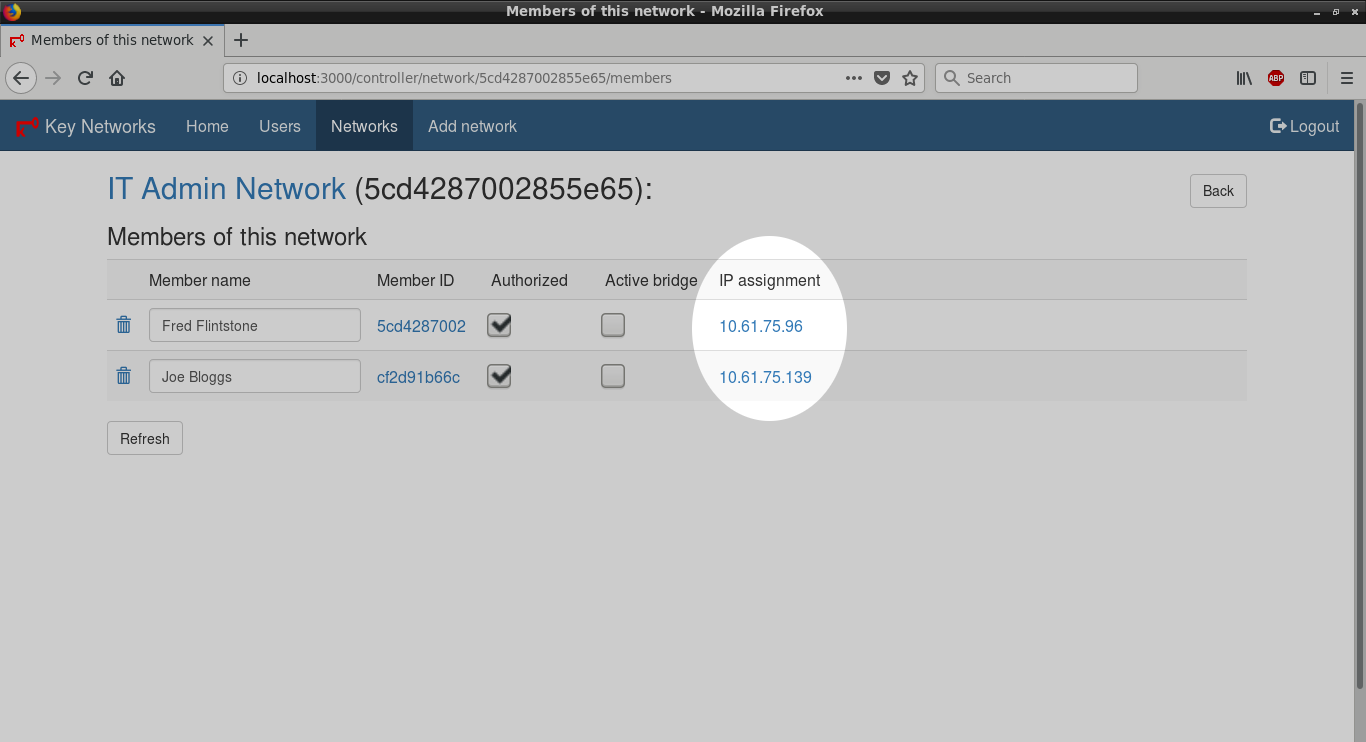
Network Members - IP Assignment
If the user is online, you should see their IP assignment appear
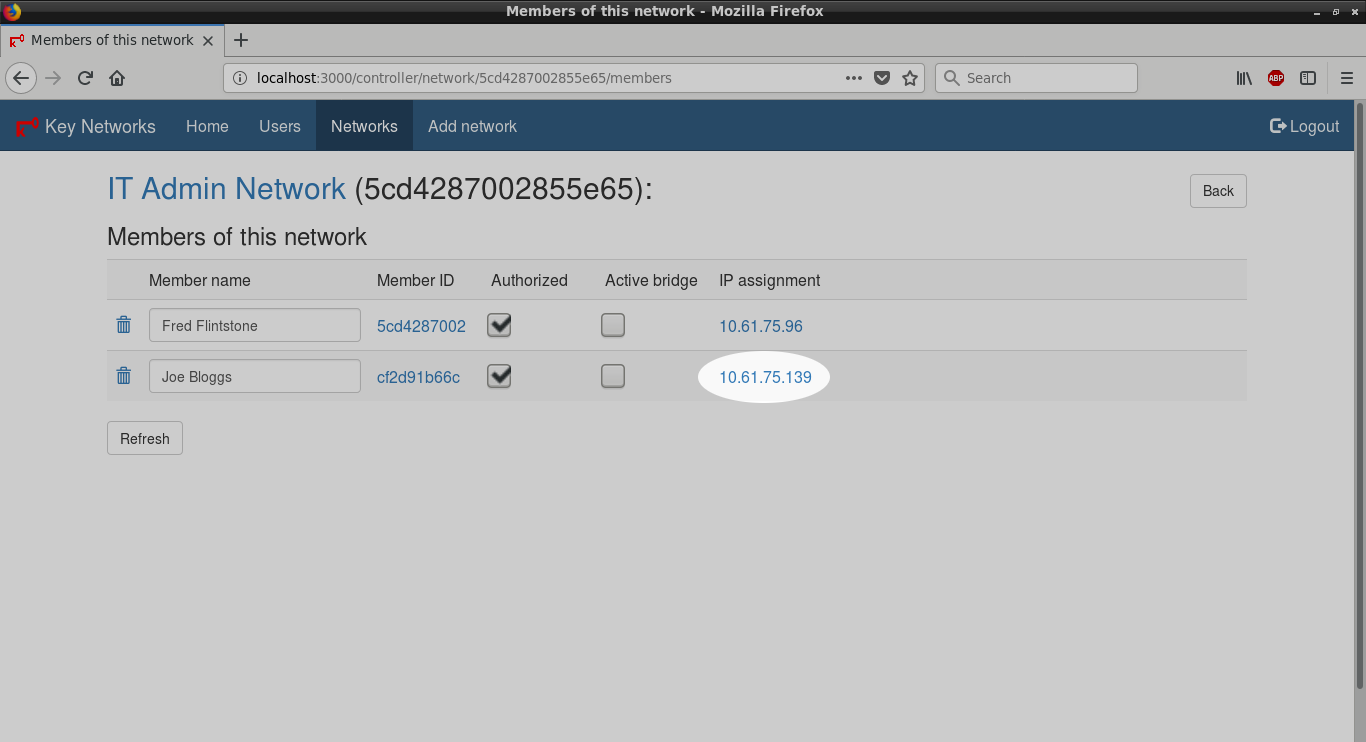
Network Members - IP Assignment Link
Click the IP address to change the IP assignment
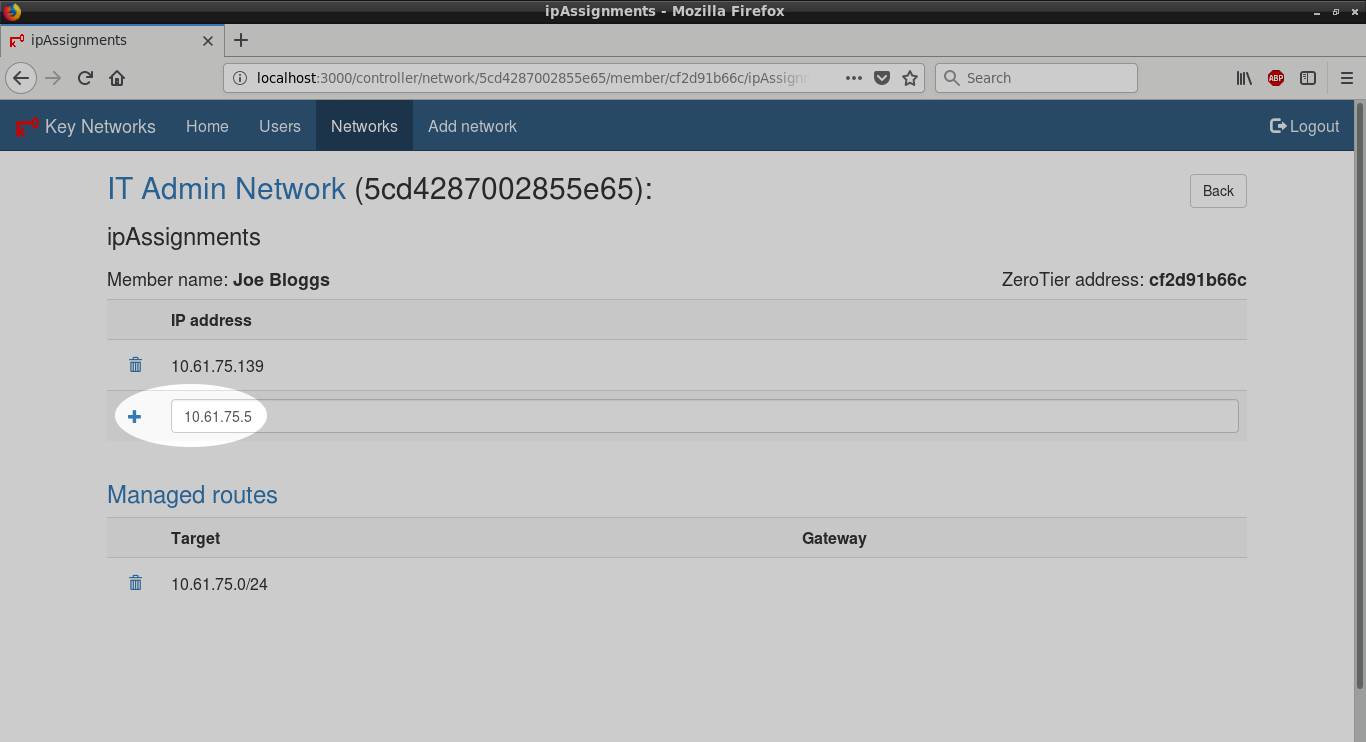
Network Members - IP Assignment Add
Enter an IP address within the managed route subnet listed below, then click the + icon
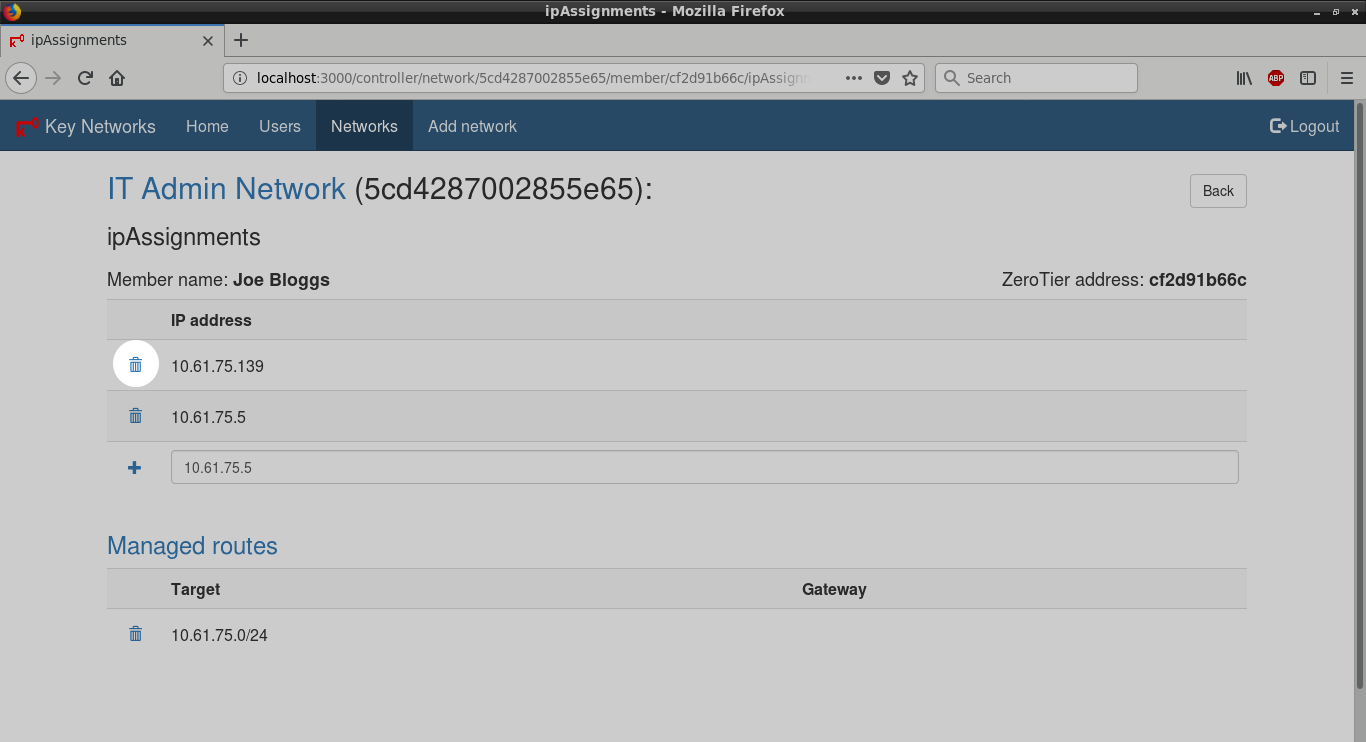
Network Members - IP Assignment Delete
Click the trash-can icon next to the automatically assigned IP address to delete it
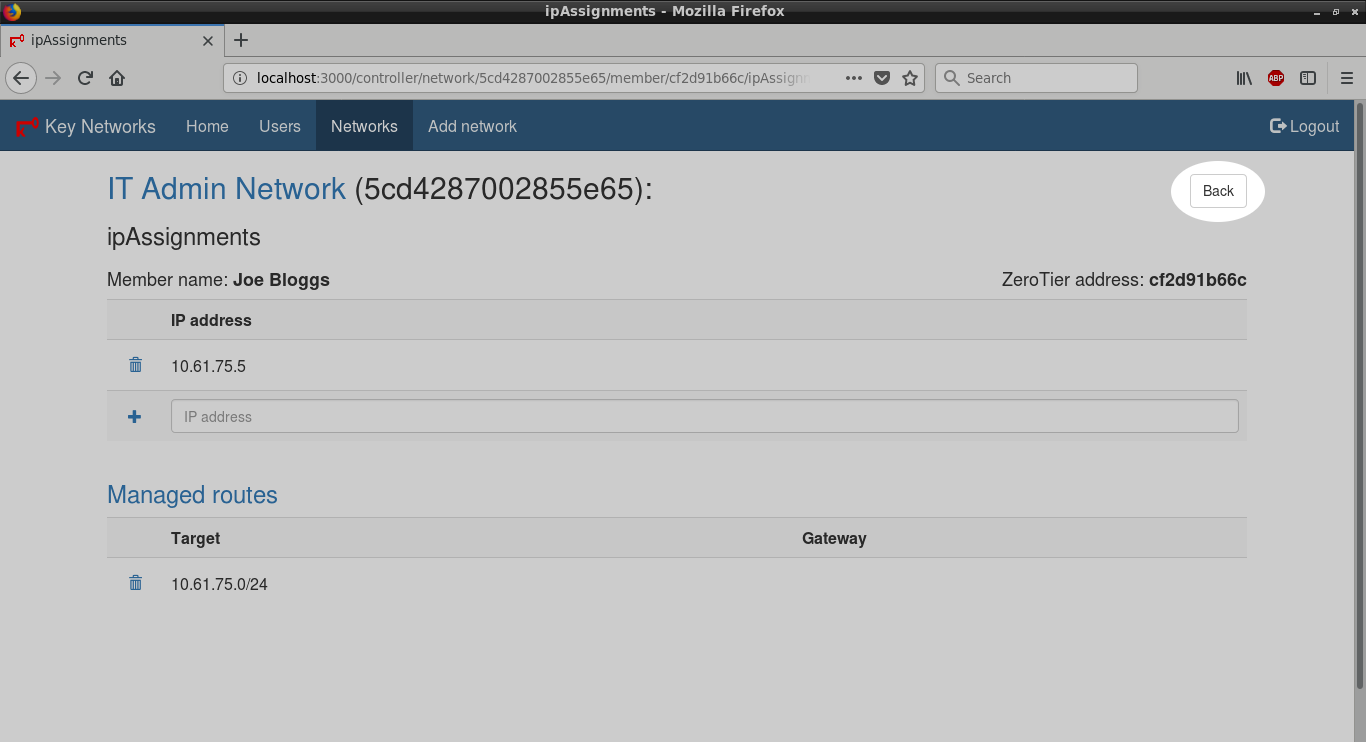
Network Members - IP Assignment Done
IP Assignment completed - click the Back button to return to the Members page
Network Members
IP assignment changed
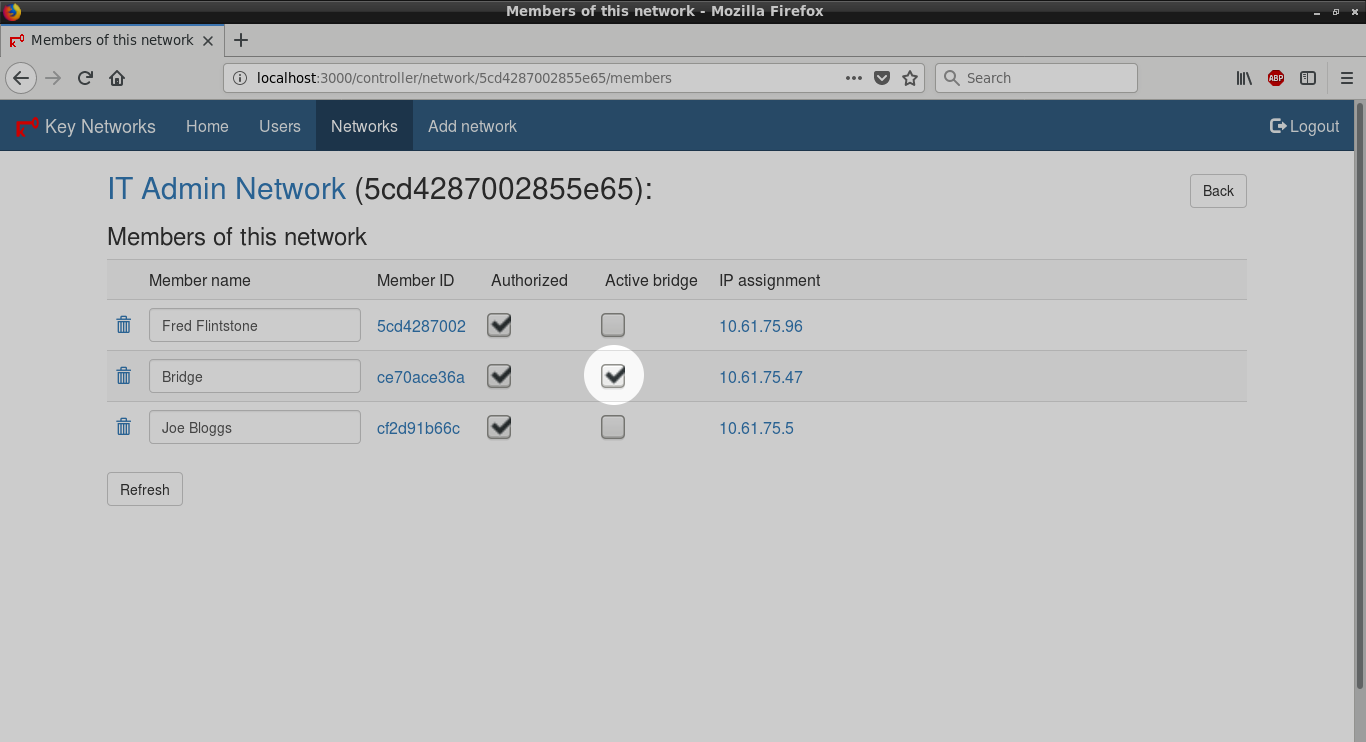
Network Members - Active Bridge
Check Active bridge to enable Ethernet bridging between virtual and physical networks
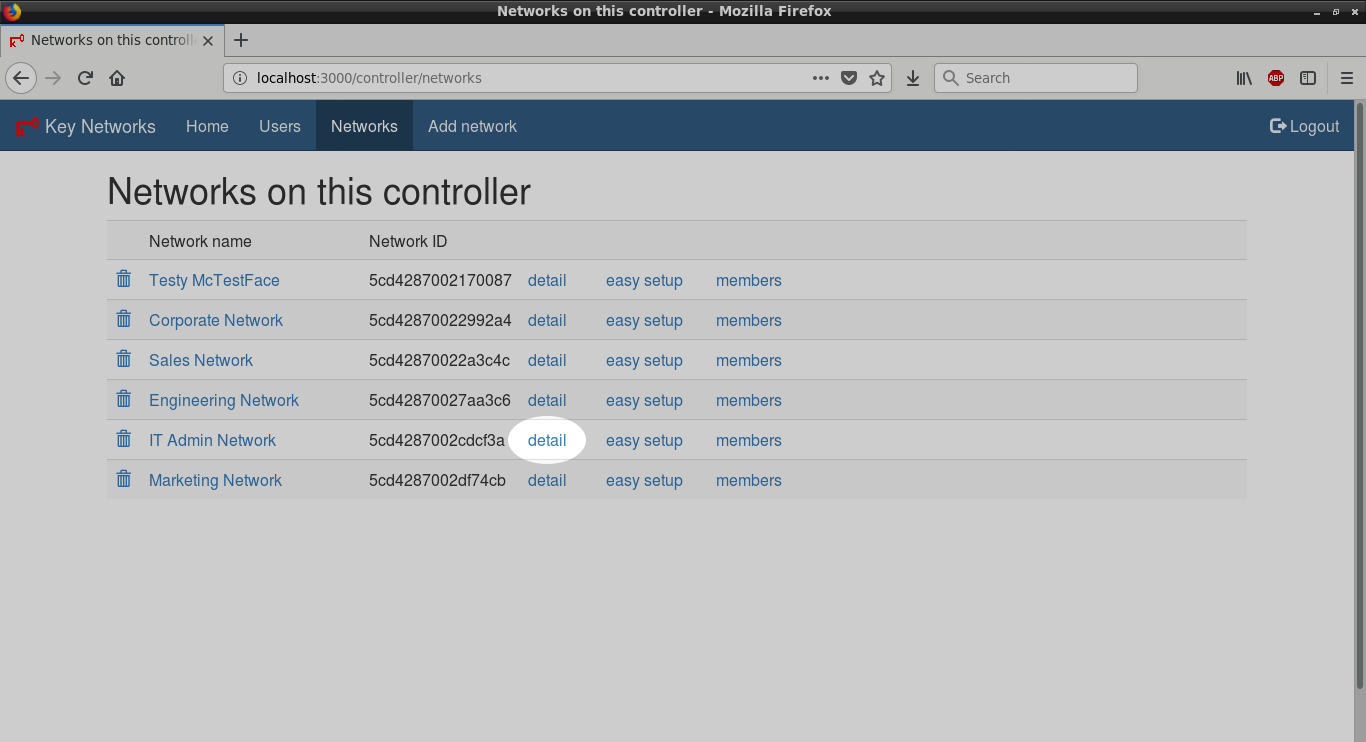
Network Detail - Link
Click detail to view and edit the detail of a network
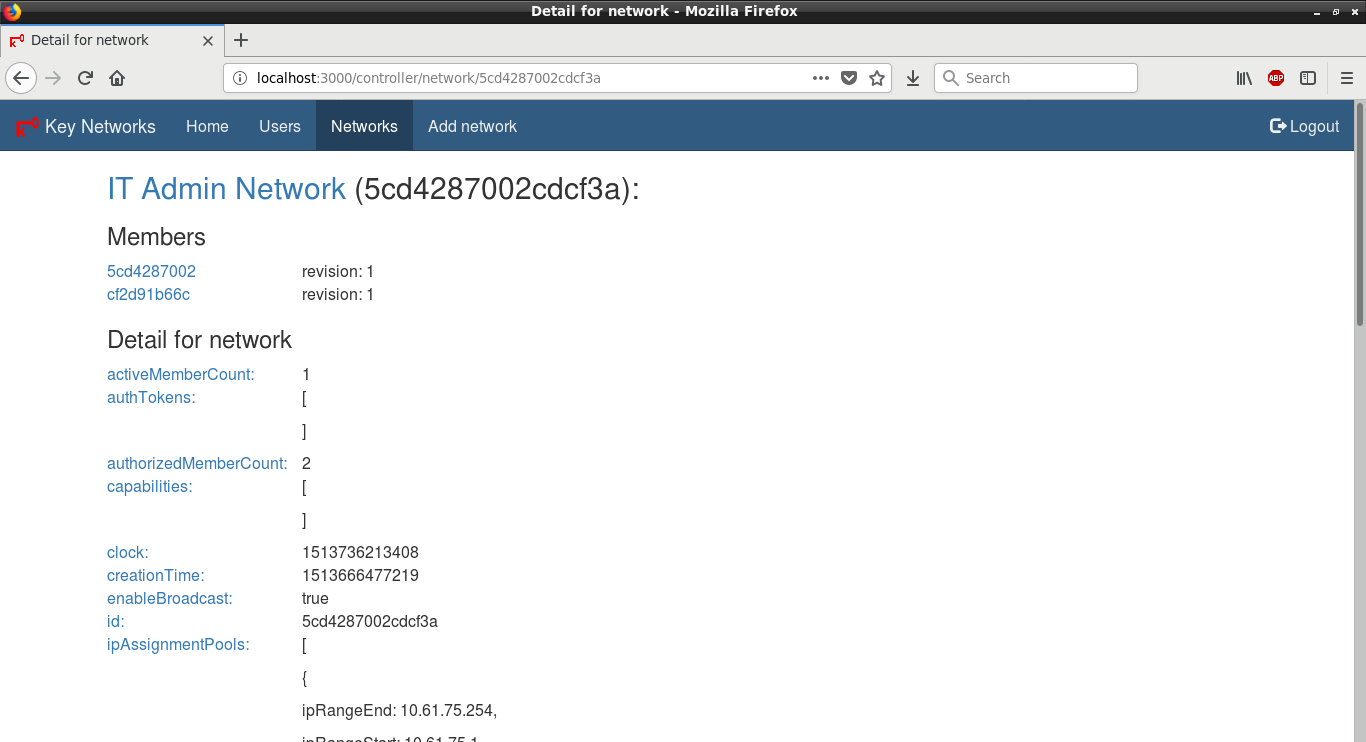
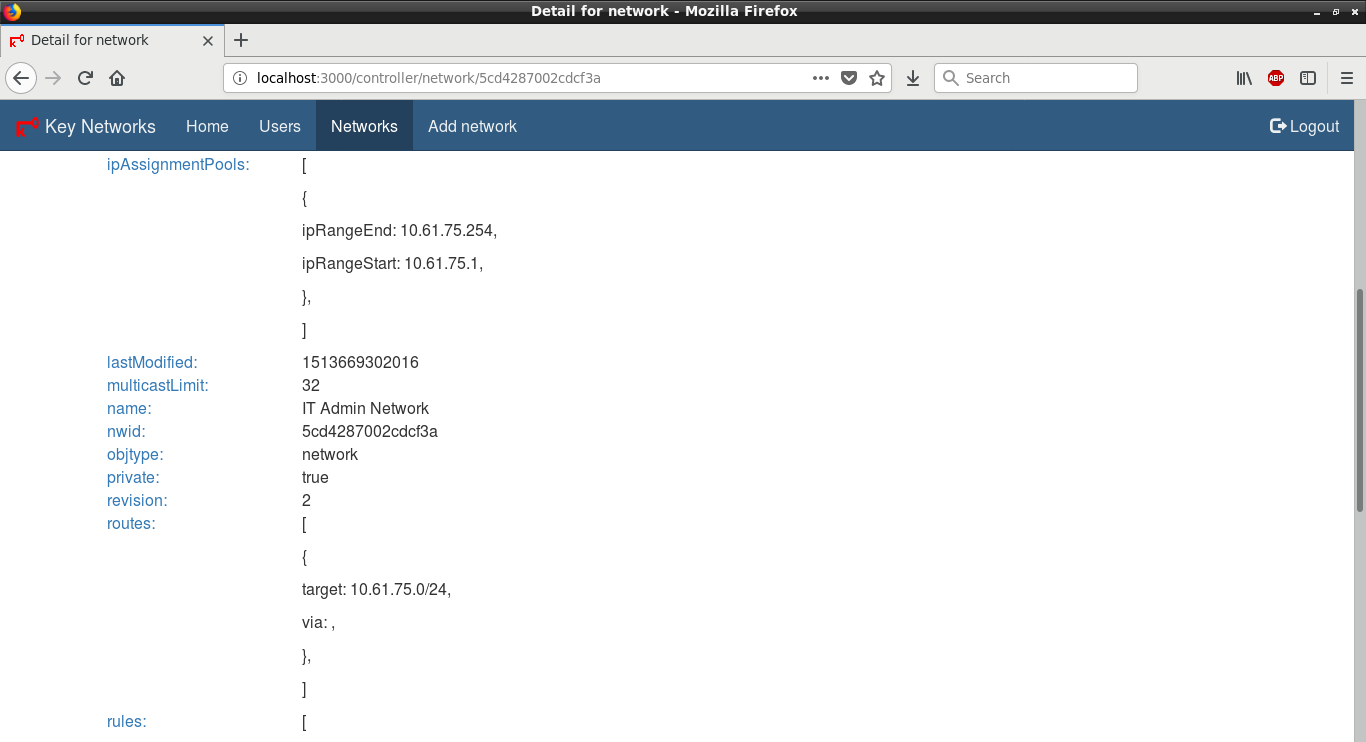
Network Detail - 1
Certain parameters can be modified - e.g. ipAssignmentPools
Network Detail - 2
Network name and routes can also be modified
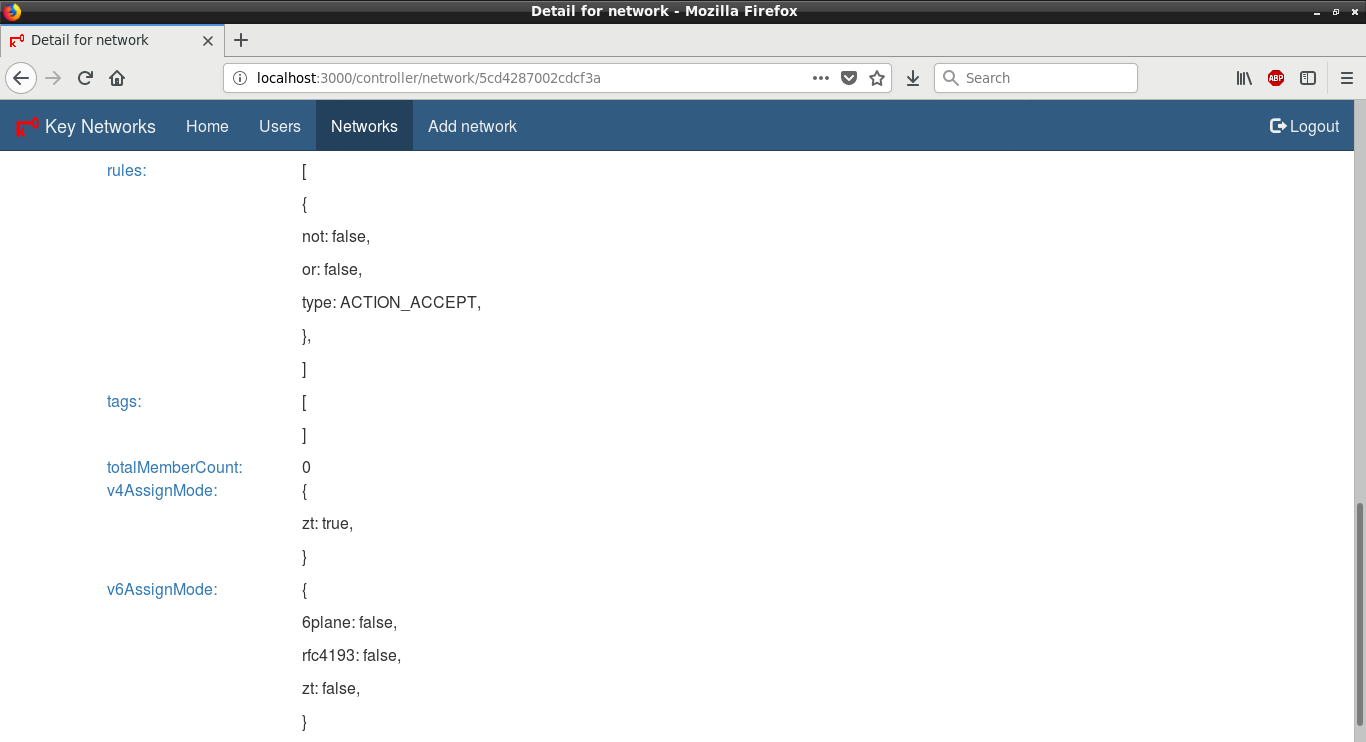
Network Detail - 3
v4AssignMode and v6AssignMode can be modified
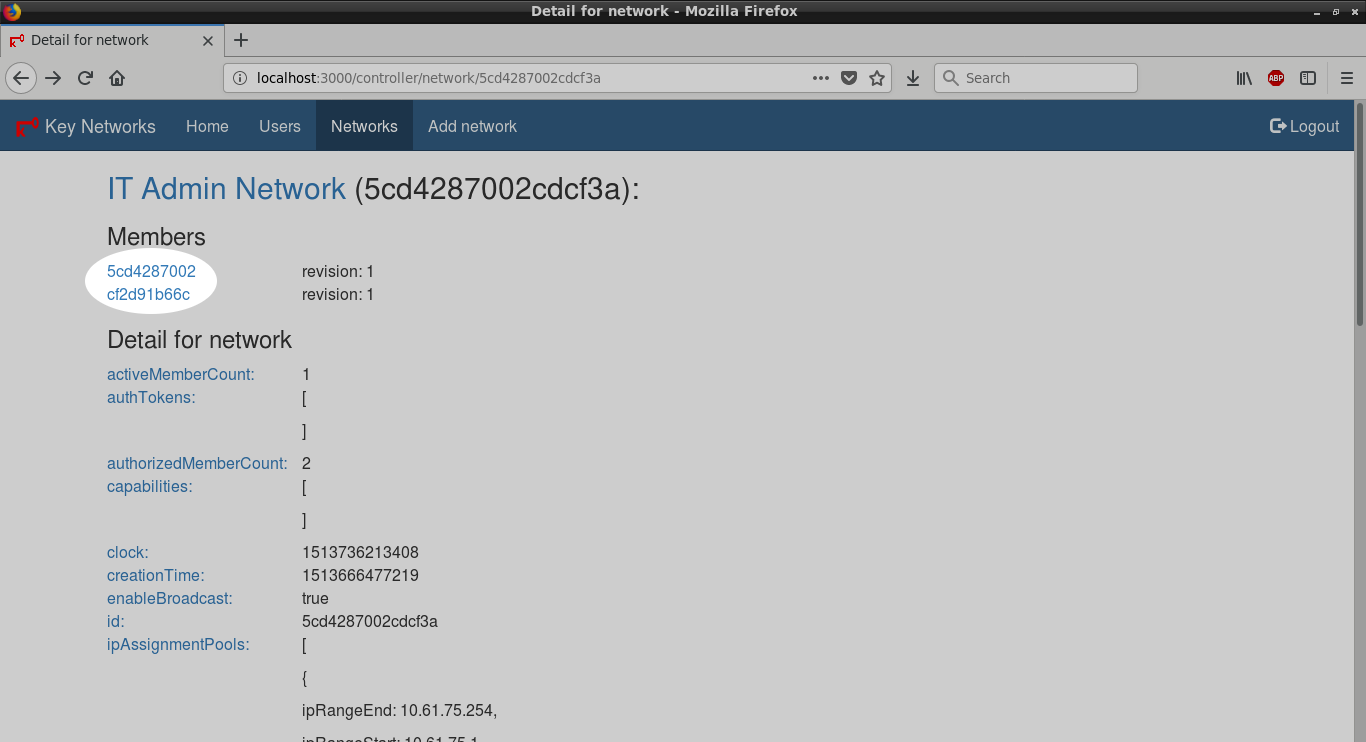
Member Detail - Link
Click the member's ZT address to view member detail


